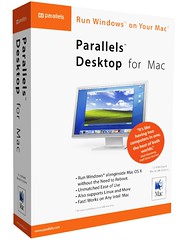
Parallels Opens Windows For Mac Users

If you’ve been following my columns, you may remember about a year ago I wrote a story on Apple’s Boot Camp, a program that allows you to smoothly run Microsoft Windows on your Intel Mac. Boot Camp is still a great program, but you need to restart your computer every time you want to use the Windows side. I found something even better that will run Windows within your OS X with no lag time and no need to reboot. I’ve seen various emulator programs before but Parallels Desktop for Mac is now my top choice.
Yet another item I found at this year’s MacWorld, Parallels Desktop for Mac (Update Release Candidate), was named the “Best in Show.” It’s the best solution out there for running Windows within OS X. In other words, you can have what’s equivalent to a stand-alone computer running within your Mac. Easily run your favorite Mac and Windows applications at the same time without rebooting your machine.
Installing Parallels is the same as installing any one of your other programs. Before you begin, make sure you have a Parallels activation key and a Windows install disk along with a valid serial number to use (any Windows from version 3.1 to Vista). You then go through the built-in Installation Assistant tool and it walks you through the entire install process. The next step is setting up your virtual machine (VM). It’s very simple to do with the setup wizard, as you kick back and wait for your new Windows VM to install and configure itself.
Once you have everything set, you’re ready to experience Parallels. One of the first and best features that I tried out is running Windows applications without actually seeing the Windows operating system. When you switch to the Coherence mode, your Windows desktop disappears, yet you can use your Windows applications running directly on your Mac desktop. You can add any Windows application shortcut to your Mac application dock. Choose to show or hide the Windows task bar - even if it’s hidden, you can access the Windows Start Menu by clicking the Parallels icon in the dock.
Other features include a “plug and play” USB 2.0 support and full-feature virtual CD/DVD drive. The USB 2.0 support allows you to access your USB devices such as an external hard drive, printer, scanner, etc. at their native speeds. Your iSight camera or built-in camera on your MacBook/MacBook Pro are also fully supported in the VMs. No complicated setup is required to make your USB devices work, but sorry, it looks like firewire isn’t supported. As for the CD/DVD drive, you can burn your CD/DVDs directly in your VM, and play your copy-protected CD/DVDs as you would on a regular PC.
If you’re set on using Boot Camp, Parallels gives you the ability to run your entire Boot Camp installation directly in a Parallels VM without any manual configurations or complex setup. Additionally, the Transporter feature gives you the ability to move your entire existing PC, including all its settings, applications, files and profiles directly to a Parallels VM. It provides a good security blanket for those of you who are switching from Windows to Mac, and just learning your Mac.
You may wonder how all this works. Parallels simply uses your Mac’s Intel chip’s virtualization technology (VT), so there’s no slow down. In a nutshell that means that your Intel CPU acts as if it were several different CPUs, which in turn allows other operating systems to run fast on your machine. That means in addition to Windows, you could run any operating system within your Intel-chip Mac at decent speeds with no worries. Not to mention you can seamlessly connect to any network with either operating system using the same network connection.
If you’re a Mac-user that heavily uses PC programs often, Parallels is for you. You can download a free 15-day trial of it at www.parallels.com. If you should decide to purchase it, it will cost you $79.99. Other Parallels products available include Parallels Workstation, Parallels Compressor Server and Parallels Compressor Workstation.


0 Comments:
Post a Comment
<< Home